Well, here we are at the end of the summer and I have failed to post anything since March! As usual, no excuses; just idleness on my part, although I have been doing a bit of work on the model in the interim.
Before we get on to that, though, we did get in our annual trip to Florida. Split our time between the Orlando and Fort Lauderdale areas this year. Pretty much standard fare in the Orlando area but the Fort Lauderdale harbour proved interesting. Also stopped over in Daytona Beach on the way home to check out driving on the beach. Not many places left that you can do that - and even at Daytona, you are restricted to certain stretches of the beach. However, with segments four or five miles in length, this is enough to give you a feel for the experience. Here are a few shots:
Mansions in Fort Lauderdale harbour:
And their toys:
Hollywood Beach:
Miami Beach:
And early morning on Daytona Beach before the crowds get there:
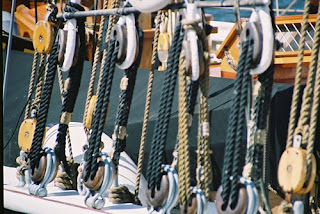
And now to the real subject of today's post - the chainstays. The chainstays are the metal straps affixed to the hull which secure the mast shrouds. In the picture below, their location on the hull can be seen in this shot of the Bluenose II, currently undergoing a major rebuild in Lunenburg, NS.
The shrouds are secured to the chainstays by pairs of dead-eyes and landyards that permit adjusting the tension of the shrouds.
I had made the dead-eyes to be used with the chainstays at the same time as I produced the blocks, the only difference being that I used hardwood for the dead-eyes rather than boxwood, The reason for this is that I felt there might be more of a need to put stress on the dead-eyes and if so, the boxwood would not likely stand up to the demands placed on it.
I made the chainstays themselves out of strips of copper sheet. To permit affixing the dead-eyes, I merely curled one end over. With a few drilled holes for the securing bolts, the chainstays themselves were basically complete.
Curled-over end:
Pre-drilled for attaching hardware: (Should have drilled the holes before painting!)
Next it was time to assemble the dead-eyes. Fortunately, Jenson has included a detailed description of the deadeyes in his book, including a 'lacing' diagram for the lanyards:
\
In some of my research, there was a suggestion to rig the dead-eyes using a template but it was not clear how this was to be done. I decided I would pre-assemble the dead-eyes and then adjust the lanyards individually after installation of the chainstays on the hull and rigging the shrouds.
The first item of business was to fasten a dead-eye to each of the chainstays. I initially tried using thread but this wasn't stable enough; plus it probably didn't replicate the full-size version in any event. Instead, I threaded wire through the chainstay and then used the resulting loop to insert the dead-eye.
Pulling on opposite ends of the wire tightened the dead-eye to the chainstay:
A few twists to fully tighten the wire around the dead-eye and a snip close to the chainstay and we're ready to start threading the upper dead-eyes.
Threading the dead-eyes was fairly straightforward - once I got the first two or three under my belt; easy to get it wrong if you don't pay attention. The only tool I devised was to use a piece of small wire to aid in getting the "lanyard" through the holes in the dead-eyes.
The first step was to knot one end of the lanyard. (In the full-scale version, there is a stopper as well, but that was a level of detail I felt I could do without,)
The 22 upper dead-eyes ready to be threaded to the corresponding dead-eye fastened to the chaistay.
Then is was merely a simple matter of following Jenson's diagram to reeve (thread) the lanyard through each pair of dead-eyes.
Repeat 21 more times and you're done!
Next post, I'll describe rigging the bowsprit. Cheers!


No comments:
Post a Comment